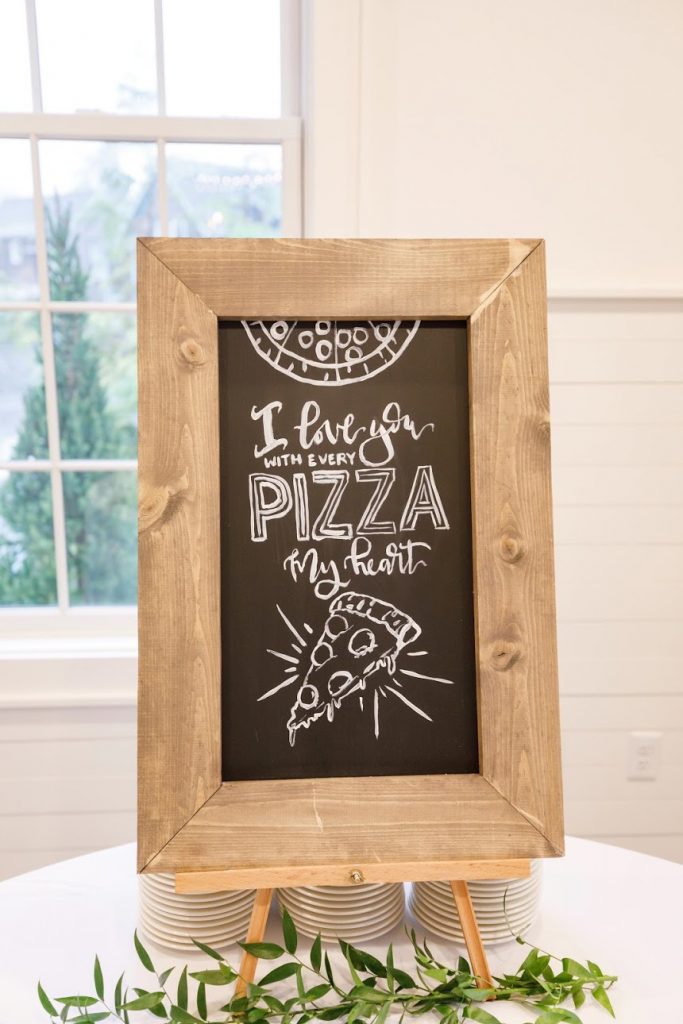
This sign has so much character, and I love a good punny joke! Because I had to wait for paint and glue to dry, I did this project over two days. It turned out great, and we love putting this sign on display for pizza nights with friends.
Step 1: Browse online until you find an image you’d like to use. I decided on this one.
Step 2: Determine how large you want your sign to be, add an inch to all sides and cut a piece of MDF board to fit your sign.
Step 3: Paint the MDF board with black chalkboard paint, and set it aside while it dries and you work on the frame.
Step 4: Get out your 1×4 pieces of pine. Use the original sign size (minus the 1″ you added to all sides) to determine how long your inside cuts should be. Then, use your miter saw set at a 45* angle and cut the 4 pieces for the frame.
Step 5: I like to apply stain before I use glue because glue will cause spots in the stain. Stain the wood with Varathane briarsmoke stain. Paint the stain on with a poly foam brush and then wiped it off within minutes with an old rag. Be sure to wear gloves so you don’t get the stain on your hands– that could make a big mess!
Step 6: Glue the frame together with wood glue to create the outside of the frame and let it dry overnight.
Step 7: Shoot 2″ finishing nails in the corners using your 18 gauge brad nailer to reinforce the corners of the frame.
Step 8: Once your chalkboard is dry, put it on your easel (optional) and get out your projector. Project the design you want to trace onto the chalkboard. Next, trace the design with a pencil. (Note: The projector I linked to is the one I have. While there are higher quality options at higher price points, I find this one does the trick for my signs.)
Step 9: Go over the lines you traced with white acrylic paint. Then, let the paint dry.
Step 10: Glue your new chalkboard sign to the frame and let it dry. You can use your electric staple gun to reinforce the glue if you want to.
Step 11: Put your sign out, invite your friends over, and eat some delicious pizza!
SUPPLIES
MDF board
1 x 4 pieces of pine for the frame
glue
Varathane briarsmoke stain
poly foam brush
gloves
white acrylic paint
easel (optional)
projector
staples (optional)
TOOLS
miter saw
18 gauge brad nailer
electric staple gun (optional)
KEY LEARNINGS
- If you look closely at my sign, you can see that I glued the frame before applying the stain, you need to apply the stain before gluing
- Go light on the blackboard paint around the edges of the sign if you plan to staple it later on, the blackboard paint is very hard and basic staples can’t penetrate it
- I ordered a variety pack of staples, and tried different options until I find staples that were strong and sharp enough to go through
Inspired by: By the Shanty 2 Chic farmhouse sign technique. Photo credit: Azzura Photography (They were our wedding photographers and we highly recommend Ken and Tania)