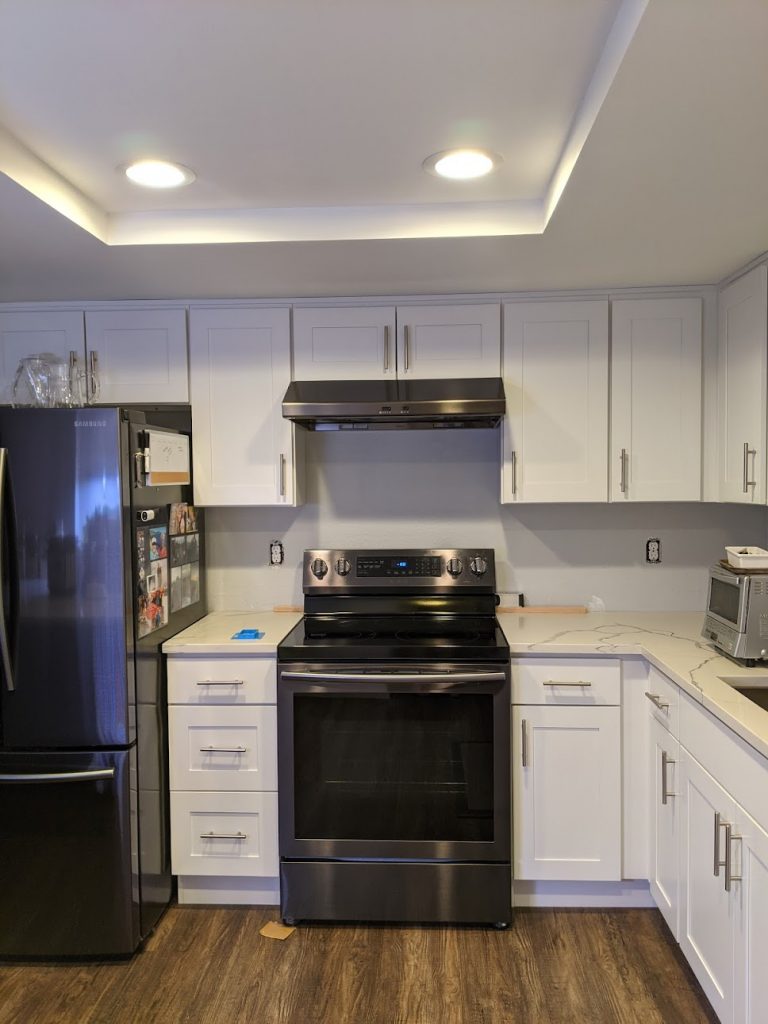
This blog is long past due. 🙂 This spring I did my first tile project, and it turned out awesome! I learned a lot along the way which I will share in the post. As a beginner, I would have made a few different choices, but I’m very happy with the end results. Yes, you can tile too– I say go for it!

I did a ton of research online before I started. I can’t say I have anything fancy in terms of tools, but I did buy myself a nice wet tile saw. It worked well and I just got to use it again to tile my tub surround. Well worth the $120.
Before you dive in, I should set expectations. I installed the tile over 2 days. The next weekend I did the grout. Then, a few weeks later I installed the window sill and caulked. In whole, the project took about 4 days spread over several weeks.
1. Start by moving your appliances out of the way and removing outlet covers.
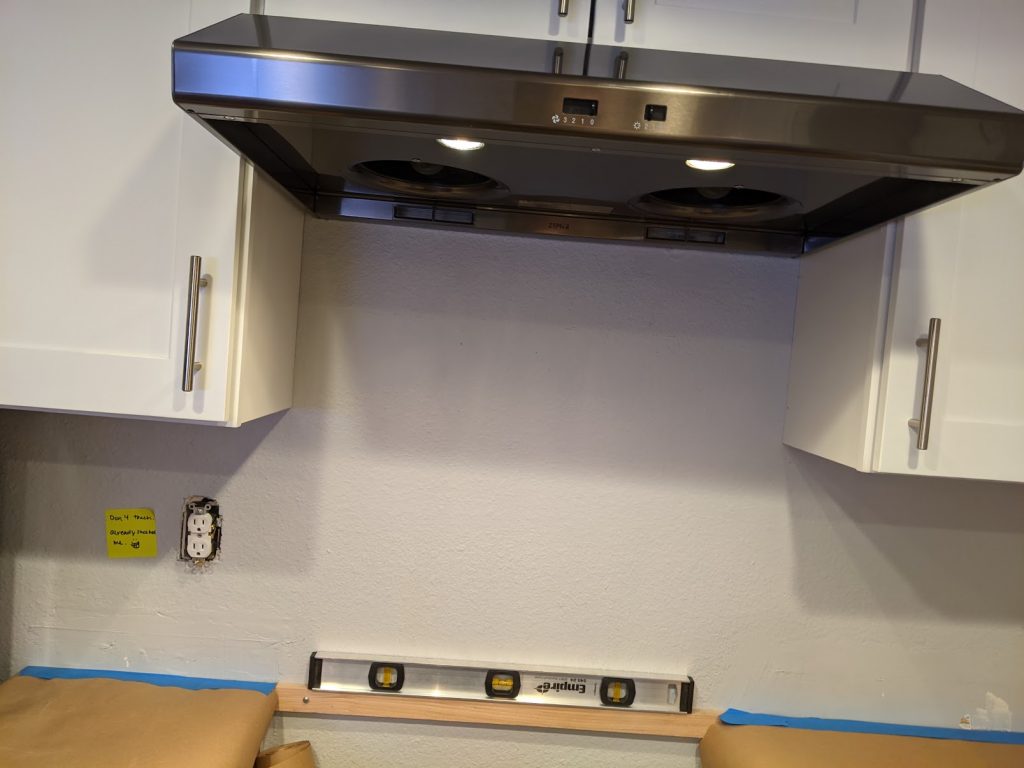
2. Add a level support if needed behind your stove.

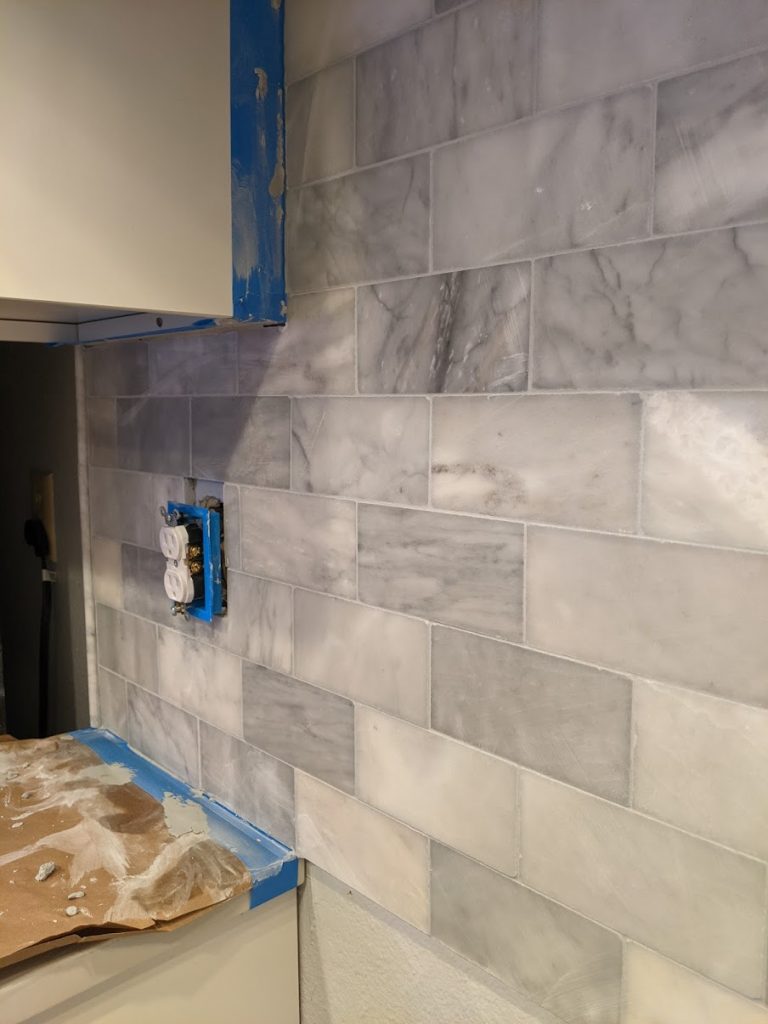
3. You’re going to want to start your tiling so it’s centered at the most visible point in the room. For me, that was the backsplash above the stove. I started at the center here. Unfortunately, when I got to the top of this area I found out the space for the stove is not aligned to the space for the vent above. The difference isn’t much, and no one else will ever notice, but the perfectionist in me hates that everything isn’t perfect. 🙂
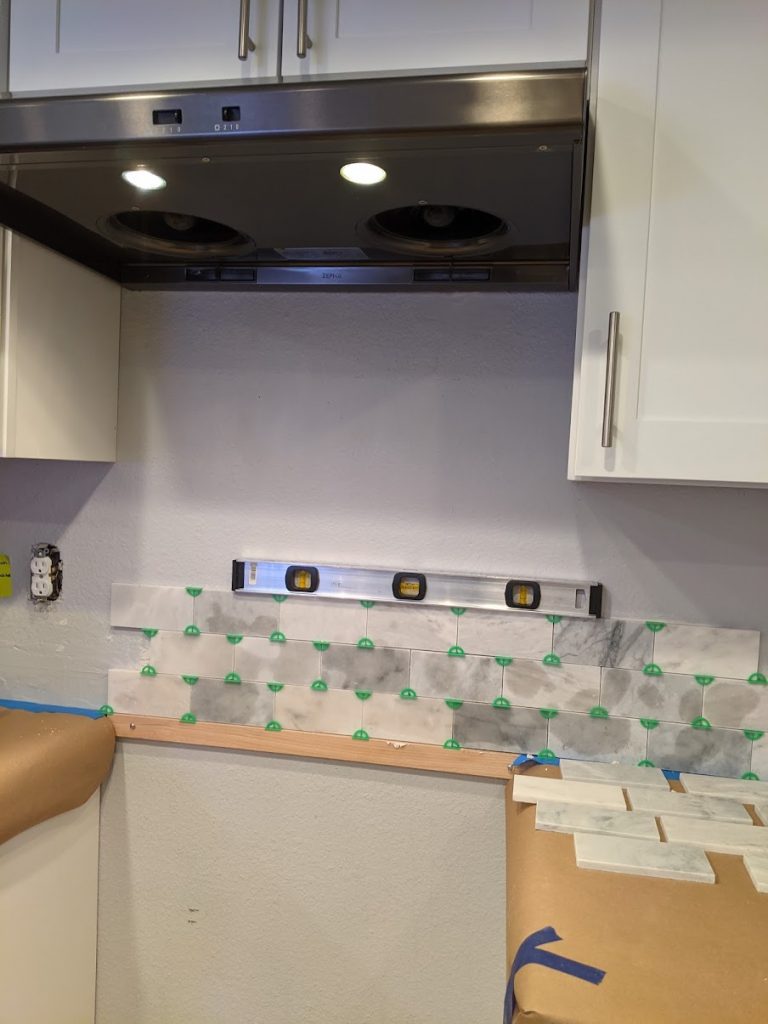
4. Check your lines with a level often so you can make minor adjustments if need.
TWO TIPS I LEARNED AROUND NOW!!
– When you are just learning to tile, back buttering each tile is cleaner and easier than spreading the thinset on the wall. It will take longer, but for me, I preferred this approach for this project since there were many cuts and the adhesive would start drying before I would get to putting the tiles up.
– Use a notching system to cut your tiles so you don’t chip them. To do this, you flip the tile over face down and do a short cut on one side. Then, flip it back top side up and finish the cut. This will keep you from getting chips on the front and edge of the tile.
– Natural stone is hard to cut. The marble is very hard and tends to crumble a bit along cuts. Ceramic would have been better as a beginner, but hey, I jumped right in an learned on the tough stuff. When I tiled my shower with ceramic tile it was a breeze.
5. Whew! Day one was productive! I finished that one wall. It took several hours. You can pull the spaces out after a few hours which is fun because the tile will look great.
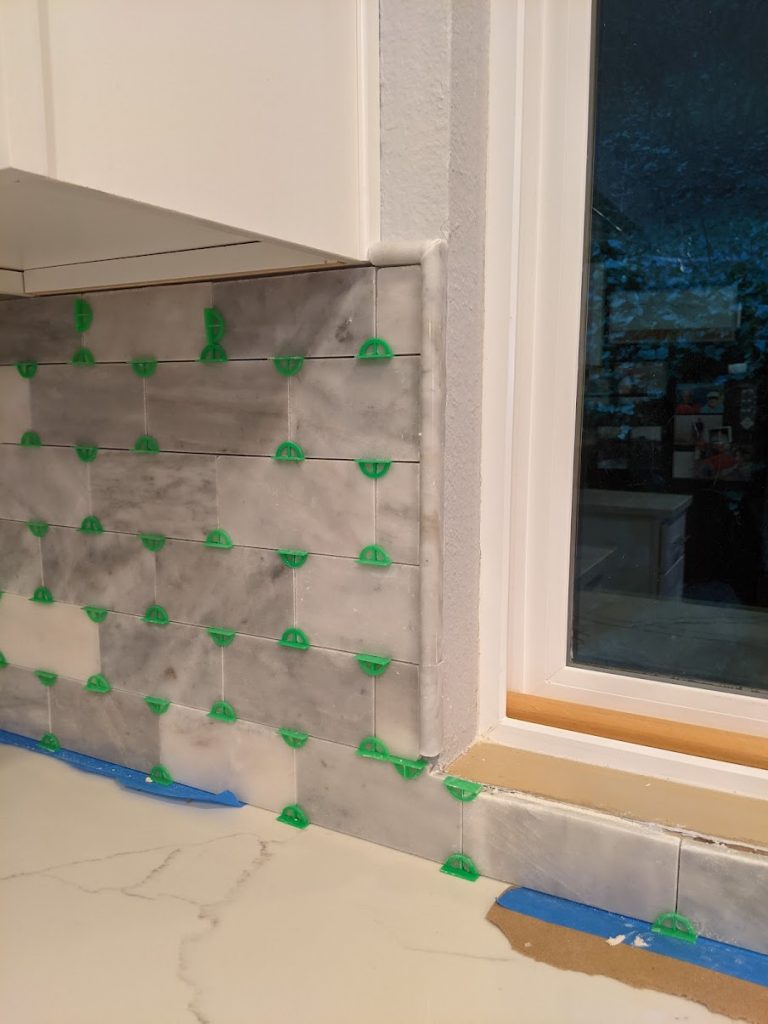
6. Day two I tiled around the window. The pencil edge tiles are hard to cut because they were crumbly too. They are expensive, but very worth it in my opinion. These gave a high end finished look– my friend who is a relator even commented on how nice they look and that most pros don’t bother with this quality finished look. You’ll see later on that I also added a window sill to full complete the window area. Note, I considered adding trim all the way around the window, but the sides aren’t equal and the one edge is quite slim, so went will something that would minimize the flaws and look great.
7. Grout day! I went with a platinum grout. From everything I’ve read and looked at in person, it’s best to go with a grout that is close to the color of your tile because it helps hide flaws. Contrasting grout will highlight ever tiny mistake. Also, going with an off white will also keep stains from showing up.
8. Next my hubby found this amazing solution for getting the outlets level. We had tried some of the standard spacers from Home Depot, but we were cutting them, melting them, etc and they still weren’t level. See below for how great these turned out!
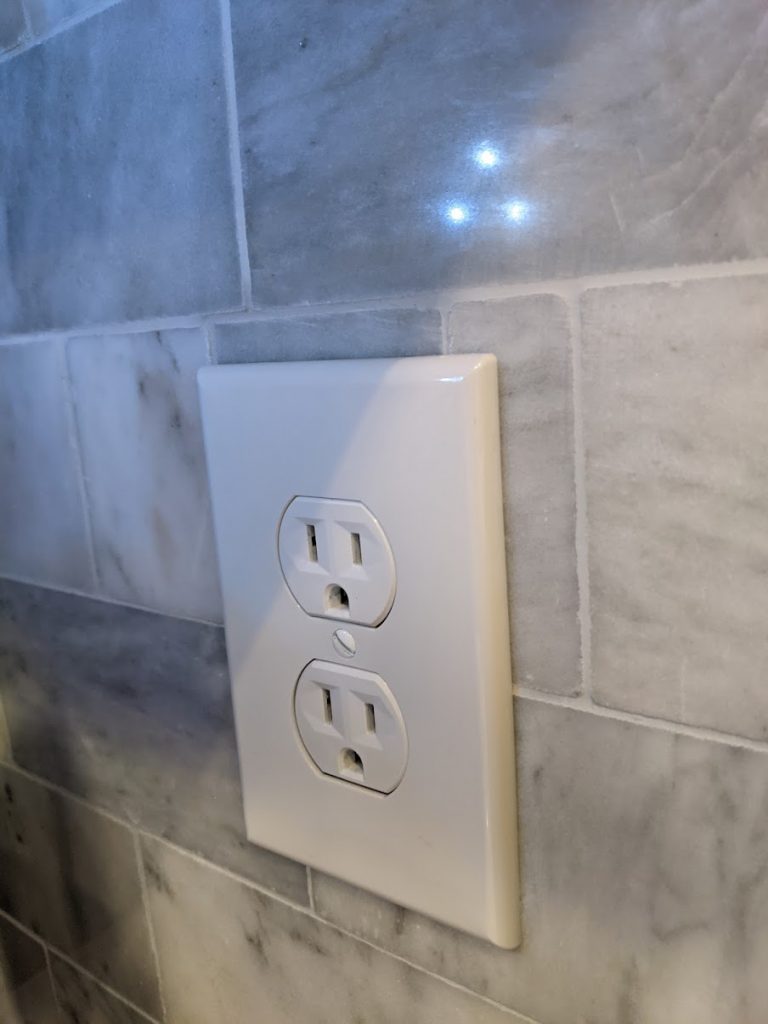
Hubby for the win!
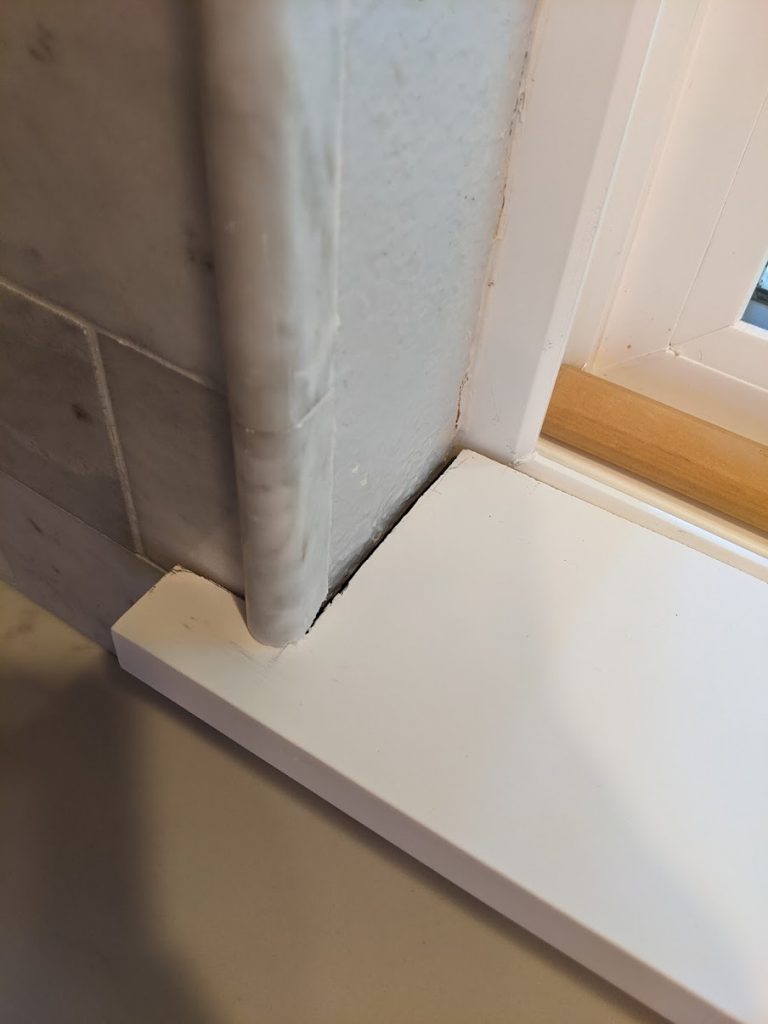
9. We cut a 1×6 to create a nice, custom fit window sill. This took me several cuts because we don’t have a table saw. We used a hand held circular saw for all the cuts. They’re not perfect, but I hid the imperfections with caulk the next day. 🙂
Sharing another look at the full window still and how we finished the tile around the window since I had a hard time finding photos like this online. This is still pre-caulk.
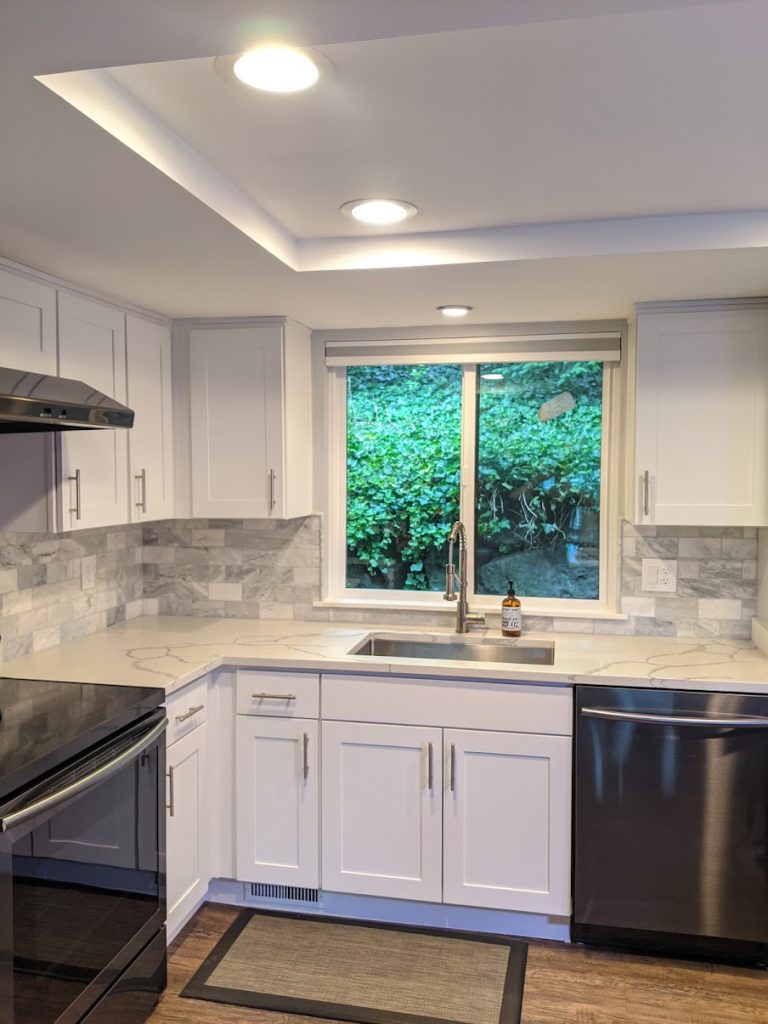
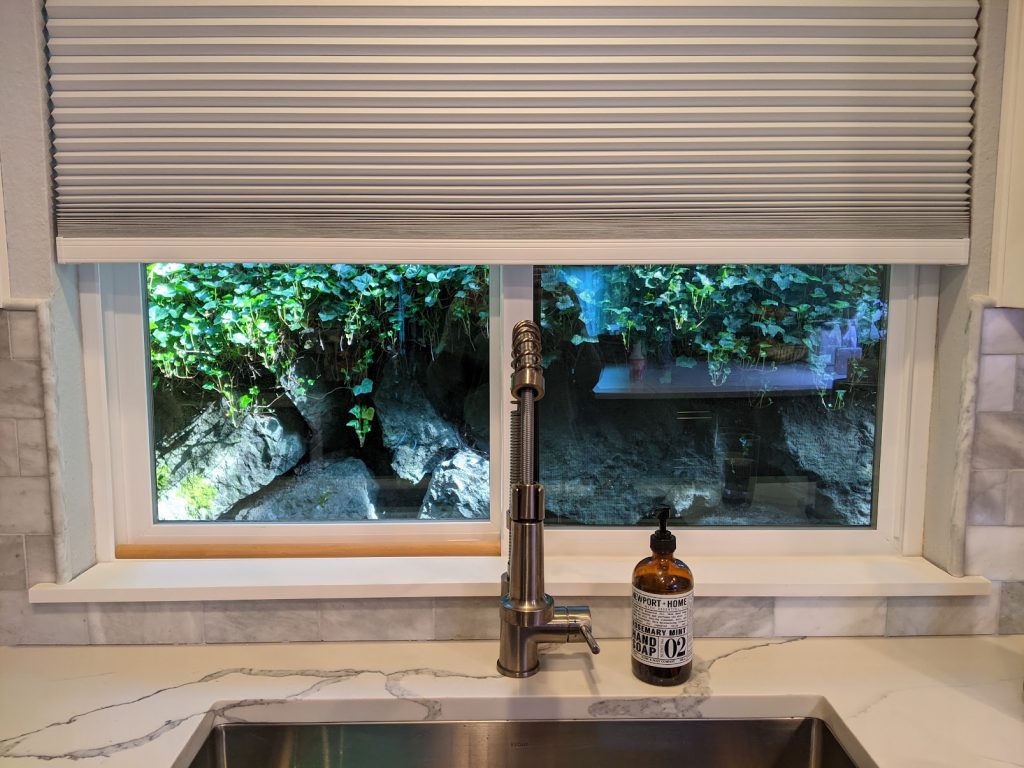
10. We finally caulked and then sealed the tile. Oh my gosh, I just love it. It made our kitchen feel so bright and fancy! Well worth all the hard work.
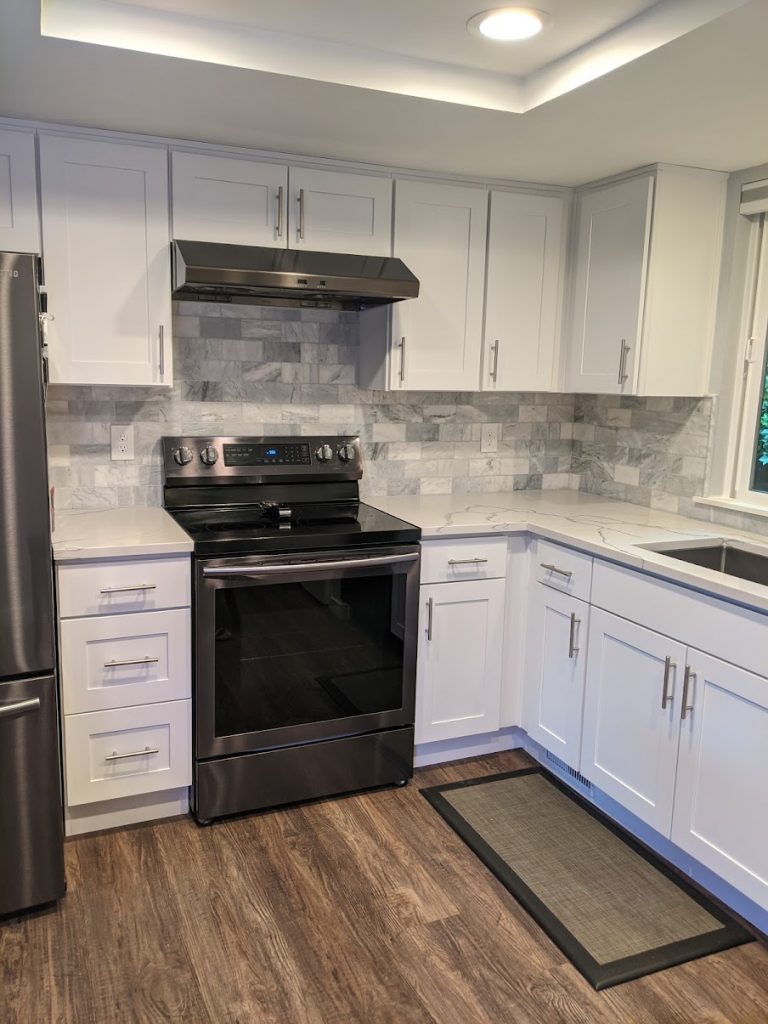
Love, love, love the end result. Marble subway tile is a great way to dress up your kitchen and looks much more high end than ceramic subway tile.
SUPPLIES
Marble subway tile
Pencil tiles
Tile adhesive
Grout in Platinum
Silicone caulk in Platinum
Stone sealer
TOOLS
Tile saw
Adhesive spreader
Buckets (2)
Sponge
Grout float
KEY LEARNINGS
- Marble is hard to cut. Beginners may want to try ceramic tile on their first project.
- Back cut a tile with a notch, then flip and cut all the way through to minimize chips.
- Back buttering the tile with the adhesive is a good way for beginners to allow plenty of time and not rush as adhesive dries on the wall.
- Choose a grout close to your tile color to hide flaws.